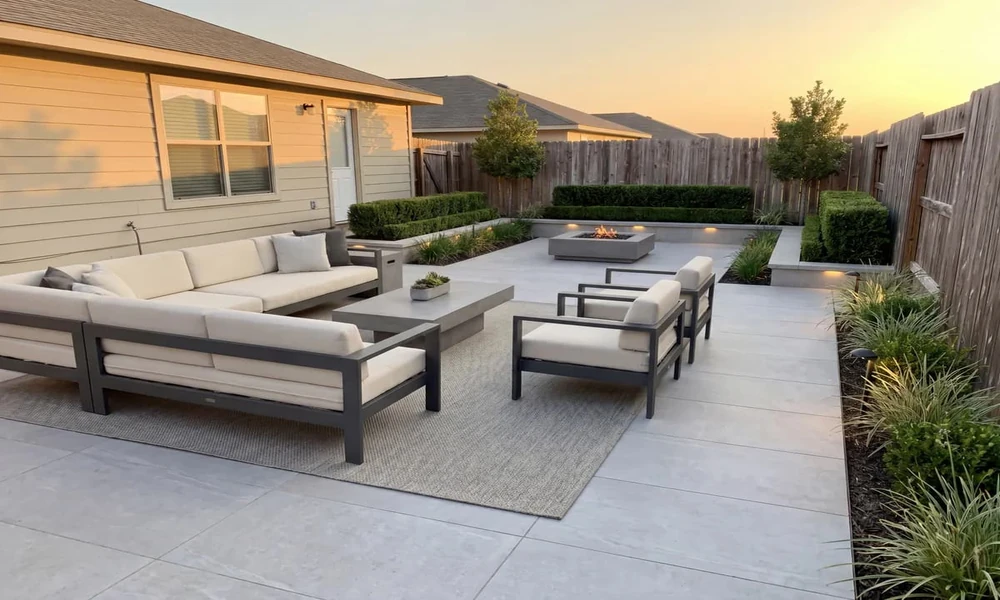

A patio can feel spacious and inviting in person yet look cramped in a photo. Strong images help homeowners compare layouts, remember what they like, and explain a project to a contractor or designer. They can also help patio businesses show their work to prospective customers. A few practical choices about light, composition, and preparation make outdoor photos more useful-whether you are documenting a renovation or simply sharing a finished space.
Start With the Purpose of the Photo
Before taking pictures, decide what you want someone to understand. A wide view can show how the patio connects to the house and yard. A closer image might explain the scale of a dining set, the finish on a table, or the way planters define a seating area. Trying to communicate everything in one frame often produces a busy image with no clear subject.
For a renovation record, take photos from consistent positions before, during, and after the work. Include details that may matter later, such as the edge of a paving area, a stair transition, or the location of a drain. For inspiration, focus on the parts of the space you would want to recreate: shade, circulation, furniture arrangement, or a mix of materials.
Choose a Helpful Time of Day
Outdoor light changes quickly. Midday sun can create harsh contrasts, especially beneath umbrellas, trees, and pergolas. Early morning or late afternoon often gives a softer, warmer look and makes it easier to see texture in wood, stone, and woven furniture. Overcast conditions can also be useful because the light is more even.
Pay attention to where shadows fall across the seating area. If the patio’s main benefit is afternoon shade, a photo taken when that shade is present tells a more accurate story than one taken in bright morning sun. Take a few test shots from different angles rather than assuming the first position will work.
Make the Layout Easy to Read
Arrange furniture as people would use it, leaving comfortable routes between doors, chairs, and dining areas. Move small clutter that distracts from the design, but do not remove everyday features that explain how the space functions. A side table beside a lounge chair or chairs pulled naturally around a dining table can make the arrangement feel understandable.
Photograph from a corner when you want to show depth, but keep vertical lines-such as door frames and posts-reasonably straight. If the image tilts, the patio may appear sloped or the structure distorted. A phone’s grid setting can help keep the horizon level. Avoid standing too close to furniture with a wide-angle lens, since it can make nearby pieces look oversized.
Include Context and Useful Details
A patio does not exist in isolation. Showing part of the house, garden, or surrounding view helps viewers understand its scale and how it relates to the property. For a small space, a carefully chosen angle can show both the seating area and the route to the door without making the image feel crowded.
Then take detail shots. Photograph a tabletop, cushion fabric, paving joint, or shade feature close enough to show its appearance. These views are useful when comparing products or discussing materials with a professional. If you are documenting construction, capture transitions and finishing work before they are hidden by furniture or planting.
Keep the Images Honest and Useful
Light editing can correct exposure, crop distractions, and bring a photo closer to what the eye saw. Heavy filters, dramatic color changes, or edits that remove permanent features can mislead anyone using the image to make a purchasing or design decision. When sharing a project, add a short caption with practical context: approximate patio dimensions, the type of surface, or what the space is used for. Avoid including identifiable people, house numbers, or other private details without permission.
Photographers and patio businesses that want to share design ideas beyond their own websites may also look for relevant editorial outlets. A directory of photography guest posting websites can help identify blogs that publish visual and photography-related articles. The best fit is one whose readers would genuinely benefit from the project, technique, or design lesson-not simply a place to post an image.
Make a Project Gallery Easier to Find
For contractors, furniture retailers, and landscape designers, a photo gallery can answer questions that a product description cannot. Organize images by project type or feature, use clear captions, and make sure each page explains the work shown. Compress image files so pages load efficiently, while retaining enough detail for viewers to see materials and finishes.
Search visibility also depends on more than the photos. Page titles and descriptions should accurately explain what a gallery contains, and image alternative text should describe the image for visitors using assistive technology. A focused meta tags audit can reveal missing, duplicate, or vague page titles and descriptions. Osdire’s SEO audit checklist covers these checks alongside technical and content issues that can affect a business website.
Build a Record You Can Use
Keep original files organized by project and date, and save a small set of edited images for sharing. A consistent photo record helps homeowners track decisions and progress; for professionals, it creates a clear portfolio of completed work. Most importantly, take pictures that explain how a patio is built and lived in. Attractive images catch attention, but useful ones help people make better choices for their own outdoor spaces.
How to Photograph a Patio So Its Design Works on Screen and in Real Life